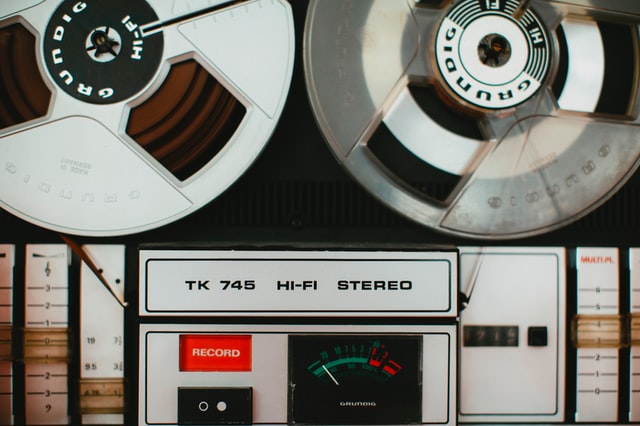
Old VHS tapes, cassette tapes, and camcorder recordings often hold our most treasured memories — family gatherings, childhood events, and moments we can never recreate. However, as time passes, these tapes degrade, and the devices used to play them become obsolete. That’s why Tapes to Digital conversion has become so important. By digitizing your old tapes, you can preserve them in a modern, accessible format without losing quality.
In this guide, we’ll walk you through everything you need to know about converting tapes to digital, the best tools to use, and how to ensure your videos and audio retain their original quality.
Why Converting Tapes to Digital Is Essential
Magnetic tapes, whether video or audio, have a limited lifespan. Over time, the magnetic particles that store information degrade, resulting in faded images, distorted sound, or total data loss. Humidity, temperature, and even simple aging can cause irreversible damage.
By converting your tapes to digital, you’re ensuring that these memories last forever in a secure, easy-to-share format. Digital files don’t degrade over time, and they can be easily backed up, edited, or shared online.
Understanding the Different Types of Tapes
Before you begin converting, it’s important to identify what kind of tapes you have. Different formats require different playback devices and capture methods.
Here are the most common types of analog tapes:
- VHS and VHS-C: Common home video formats used in camcorders and VCRs.
- MiniDV and Hi8: Popular in digital camcorders during the 1990s and early 2000s.
- Audio Cassette Tapes: Used for music recordings or voice memos.
- Betamax: An older video format similar to VHS but less common.
Knowing your tape type helps you choose the right equipment and connection methods when converting tapes to digital.
Equipment You’ll Need to Convert Tapes to Digital
The conversion process requires both playback and recording tools. Below is a list of what you’ll typically need:
For Video Tapes (VHS, MiniDV, Hi8)
- Playback Device – A functioning VCR or camcorder compatible with your tape format.
- Video Capture Device – A USB video capture card or an analog-to-digital converter that connects your player to a computer.
- Cables – RCA (red, white, yellow) or S-Video cables for video and audio transfer.
- Computer or Laptop – Used to record and save your digital files.
- Video Capture Software – Programs like OBS Studio, Elgato Video Capture, or Roxio Easy VHS to DVD.
For Audio Cassettes
- Cassette Player – A working tape deck or Walkman-style player.
- Audio Cable – A 3.5mm auxiliary (AUX) cable to connect your player to the computer.
- Audio Recording Software – Free tools like Audacity or GarageBand for high-quality recording.
Step-by-Step Guide: Converting Tapes to Digital
Follow these steps carefully to ensure you maintain the best possible quality during conversion.
Step 1: Clean and Inspect Your Tapes
Before starting, check your tapes for mold, dust, or damage. Gently clean them using a soft cloth or a professional tape cleaner. This step can prevent playback errors and protect your devices.
Step 2: Set Up Your Playback Device
Connect your playback device (VCR or camcorder) to your computer using the appropriate cables and video capture card. Ensure all connections are tight, and select the correct input source on your computer.
Step 3: Install and Configure Capture Software
Open your chosen video or audio capture software. Adjust the recording settings — select high-resolution (720p or higher for video) and uncompressed or high-bitrate audio settings to prevent quality loss.
Step 4: Play and Record
Press “Play” on your tape player and “Record” in your capture software simultaneously. Let the tape play in real-time — don’t fast-forward or skip parts, as that can cause data loss.
Ensure that your computer isn’t running heavy programs during the transfer to prevent dropped frames or lag.
Step 5: Save and Edit
Once the recording is complete, stop the capture and save your digital file. You can use video or audio editing software like Adobe Premiere Pro, DaVinci Resolve, or Audacity to clean up noise, trim sections, or enhance color and sound quality.
Step 6: Backup Your Files
Always create multiple backups of your newly converted files. Save copies on external hard drives, cloud storage, or USB drives. Digital storage ensures your memories remain protected from hardware failures or accidental deletions.
Tips to Maintain the Best Quality During Conversion
Converting tapes to digital is not just about transferring data — it’s about preserving quality. Here are some expert tips to make sure your results look and sound as close to the original as possible:
- Use High-Quality Capture Devices – Cheap capture cards can produce grainy or distorted video. Invest in a reputable converter.
- Record in an Uncompressed Format – Avoid overly compressed formats like low-bitrate MP4s. Capture in AVI or MOV for better results, then compress later if needed.
- Avoid Poor Lighting or Glare – If your VCR output looks dull, adjust brightness, contrast, and color levels using your capture software.
- Stabilize Audio Levels – Use equalization tools to reduce hiss or background noise without distorting voices or music.
- Keep Hardware in Good Condition – Dirty playback heads can ruin your transfer. Clean them periodically with specialized cleaning tapes.
Professional Tapes to Digital Services
If you’re not confident doing it yourself or your tapes are too valuable to risk, consider hiring a Tapes to Digital conversion service. These professionals use specialized equipment to restore and digitize old footage with exceptional precision.
Professional services often offer features such as:
- Color correction and image restoration
- Noise reduction and audio enhancement
- Custom labeling and file organization
- Cloud delivery or USB transfer options
Although it costs more than DIY methods, professional conversion guarantees the best results — especially for rare or fragile tapes.
Organizing and Preserving Your Digital Files
After converting your tapes to digital, organization is key. Label each file clearly with names, dates, or event descriptions to make them easy to find later. Store your files in folders by category, such as “Family Events,” “Vacations,” or “Old Home Videos.”
Regularly back up your collection on multiple platforms. Cloud services like Google Drive, Dropbox, or OneDrive provide reliable long-term storage and accessibility from anywhere.
The Future of Your Memories
Converting your old tapes to digital is more than a technical process — it’s about preserving your history for future generations. With the right tools, care, and attention to detail, you can ensure that your treasured moments remain vibrant and accessible forever.


More Stories
A Step-by-Step Guide to Using WPS Effectively
Boost Team Performance with WPS Tools
Getting Started with WPS Download: Your Complete Guide to WPS下载 Today